»Users will never be able to get their own professionally produced PCBs in an affordable way!«
Not so long ago, this was what we heard when we talked about our dream of creating a closed loop from breadboard to product with Fritzing.
One year ago that dream came true when we launched our Fritzing Fab service. In a three-week cycle we collected the sketches from you, arranged them on a panel and sent them to our factory in Berlin. The first round consisted of 12 different PCBs from 9 users.
Today we are receiving so many orders that we are delighted to announce our new one-week production cycle! From now on we will send your orders to the factory to produce your layouts every week! Thank you very much for enthusiastically using our service!
We are happy to present our new Fritzing release 0.7.5. It has a bunch of new features including the ability to have multiple PCBs in one sketch, using a brand new Arduino-Mega shield layout, new generic double row pin headers and much more.
Thanks to Alexander for translating Fritzing into Greek and to Josef for the Czech translation update.
If you don‘t know Fritzing by now:
With the Fritzing environment you can learn about and work with interactive electronics. We provide tutorials and our Fritzing software to support you and your project. Using the Fritzing software you can create PCB layouts as easily as drawing a line.
With the release of 0.7 we are dropping the Alpha in favor of a new, shiny Beta. Why do we think the new version deserves this? Because we finally cleaned up two longstanding architectural flaws. While you won’t notice any difference when you launch the new version, these changes will make your work with Fritzing clearer, cleaner, and easier, not to mention whiter, brighter, and more sparkly.
fzz is the new fz
First, we are deprecating the old .fz file format in favor of the .fzz file format (formerly known as the “shareable” format). You can still load your old .fz files, but Fritzing will only save out .fzz files. The .fzz format is just a zip file that contains a sketch file plus any custom parts used in that sketch. Essentially the new “Save” is the old “Save as Shareable”. This change eliminates a number of prompts when you open and save files, and makes sure that custom parts always travel with the sketch they belong to–which used to cause a lot of trouble.
When a sketch containing custom parts is loaded, the parts are placed into a temporary parts bin, which is only available while the sketch is open. You can move parts out of that bin (for example, into the My Parts bin) if you want to use the custom parts in other sketches.
all views are now created equal
Second, all three views now behave in the same way. There is no longer an implied workflow that suggests starting with the breadboard view and then moving on to schematics or PCB. In other words, the breadboard view is no longer the master–you can start working in any view and clean up the breadboard view later. In the old days this was very difficult because the breadboard view would get messy when you made changes in the other views.
This equality is achieved by making the breadboard view use ratsnest lines just like the other views. If you see a ratsnest line in a given view, it represents a connection you have made between parts in another view. If you always work in the same view, you will never see a ratsnest line. If you work across multiple views and see a ratnest line in a particular view, you can decide whether to lay out the connection in that view.
An important implication is that if you connect two parts by mistake–say by drawing a wire between them–and then delete the wire, the connection will be gone. But if those parts had also been connected in another view, when you delete the wire, the ratsnest line will be restored.
By contrast, deleting a ratsnest line means deleting the connection in all three views. Much of the time, this means that you will be deleting a wire between those parts. But it may mean a part gets disconnected from the breadboard in Breadboard view. Or it may mean that a wire between different parts get deleted, because the connection represented by the ratsnest line is not direct–for example, if the ratsnest line is between A and B, but the actual wires are drawn from A to C to B. So be a little careful when you delete ratsnest lines–it may be safer to switch to one of the other views and do the deletion there.
smoother
Everyone around Fritzing HQ is saying how much smoother and more predictable it is to work with Fritzing 0.7.0 compared to earlier versions. We hope you will feel the same way. Watch out for one of Stefan’s Killer Tip videos to show off some of the 0.7.0 improvements.
just in time for the season we deliver a new release to play with over the holidays. Even though it’s a minor release it comes with a lot of nifty new features:
The new parts bin navigation lets you easily browse through your part bins and has dedicated bins for some popular manufacturers.
Fritzing got much faster - especially on the Mac! We owe this speed improvement to the wonderful folks at Qt, who released the new version 4.8.
Parts can now be rotated freely in breadboard and pcb view. Just hover a selected part over a corner, then drag around.
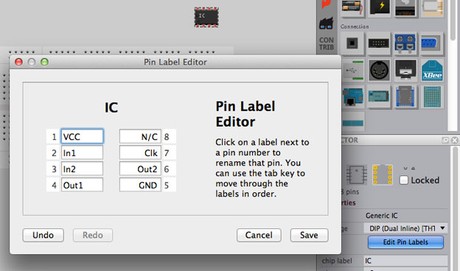
Our generic ICs now provide a dedicated pin label editor to make it easier to create custom ICs. You can find it in the inspector window.
On your PCB, you now can decide if you like to have a ground fill (empty spaces are filled with copper connected to the GND) or just a copper fill (not connected).
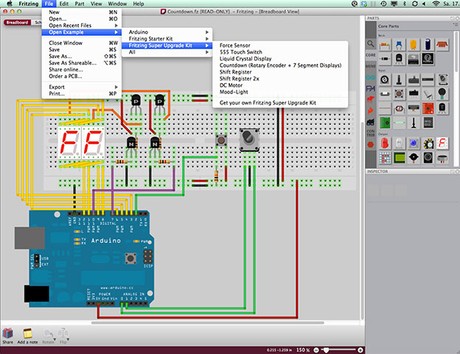
In preparation for the new Super Upgrade Kit you can find new example circuits for 7 segment displays, shift registers, rotary encoders and much more.
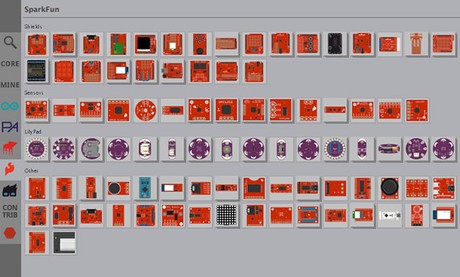
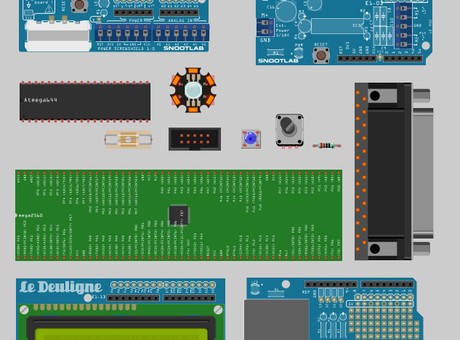
Lots of new parts from parkFun (thanks Lionel, Nathan, Ryan, Robert), Snootlab (thanks Lionel and Lionel), from the Fritzing team (shrouded pin headers, ECB transistors, 3mm LEDs, Superflux LEDs, 5 band resistors, the Atmega 2560, SSOP 28 footprint, rotary encoder).
We also finally managed to include some of the wonderful community contributed parts (fuse, low dropout voltage regulator, Atmega644, HCF 4067, RTC breakout, HEF 4094, RGB 3W Star, DB-25 connector). Thanks to Johan, Macgyveremir, Forvellos, Mike, SorkiG, Niclas, Kungfumachinist.
With the advent of OS X10.7 and the soon-to-be-released Qt 4.8 (Qt is the underlying GUI framework for Fritzing), building for OS X10.4 and/or PPC will become an extra chore. How many of you out there still need Fritzing to support these platforms?
Thanks,
j
Comments from the old blog
natm # 29. Okt. 2011, 21:52
Lots of schools still have labs full of PPC kit, I wonder how many of them are using Fritzing?
tuxilein # 5. Nov. 2011, 12:04
I am still working on an old G4 MDD which is my primary workstation. Unlike maybe other users i am prepared to compile the software myself. I'll be glad to help with building and compiling for Debian/Linux-PPC and Mac OS X/PPC if needed.